|
Projects in Progress
What's
going on...
Weblog Jan
Westerink  
Übersetzung: Frieder
Tuczek
Donnerstag den 4. Mai 2010
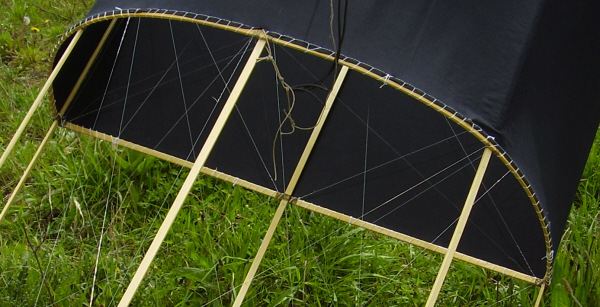
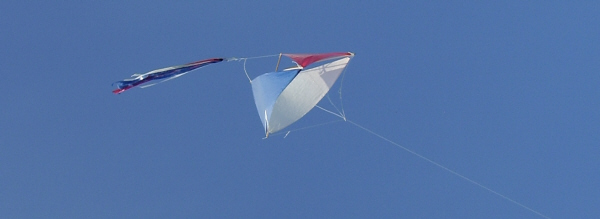
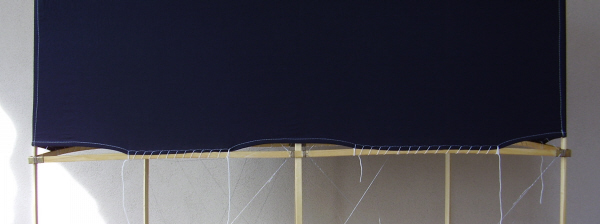
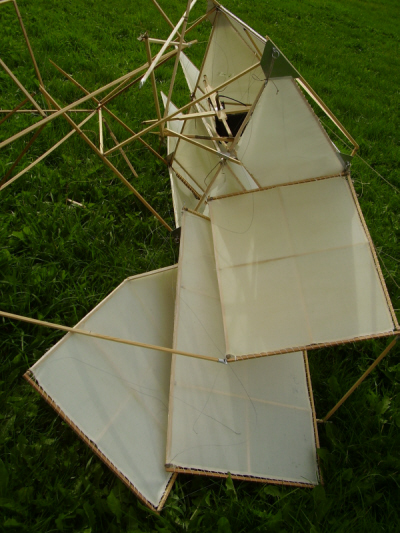
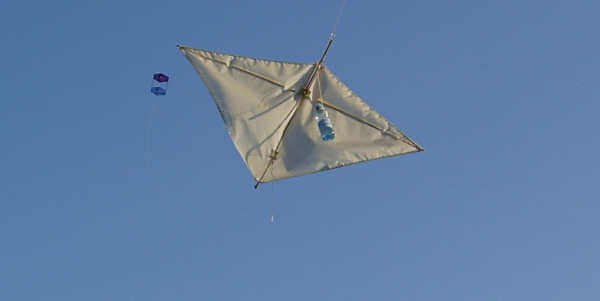
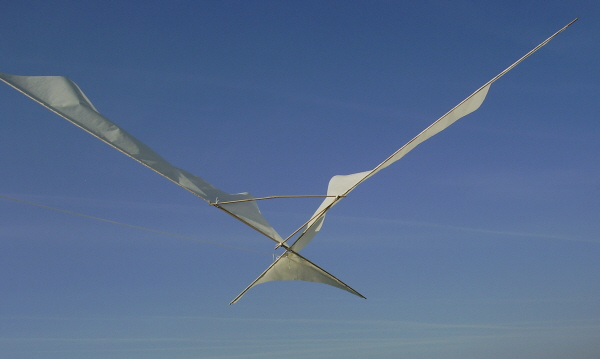
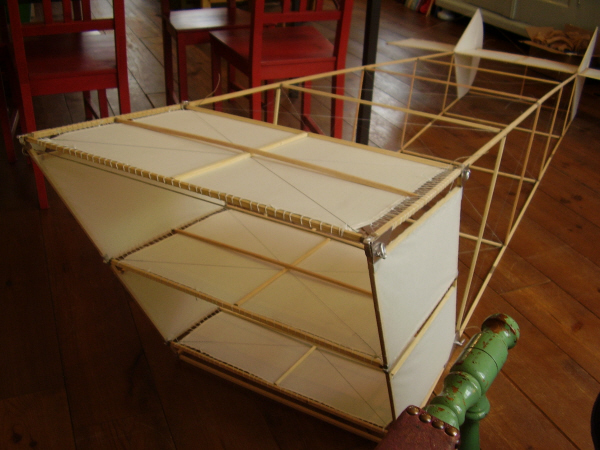
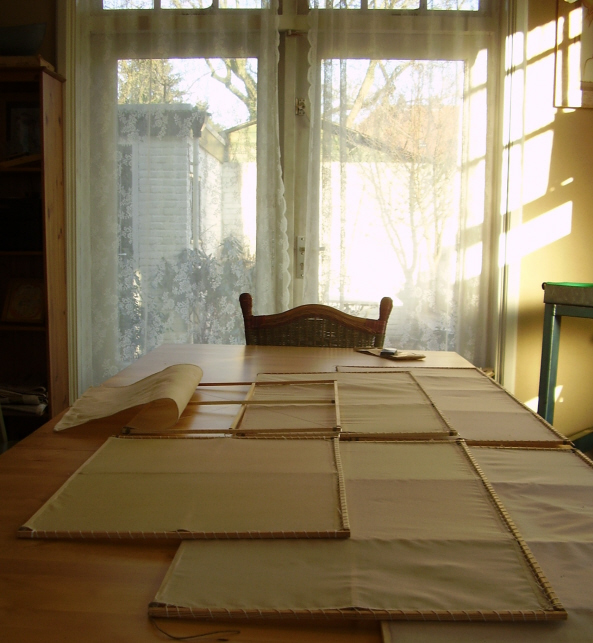
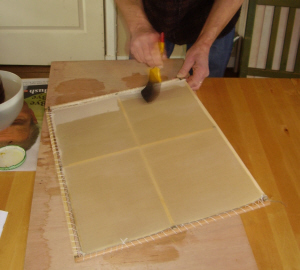
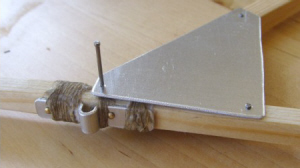
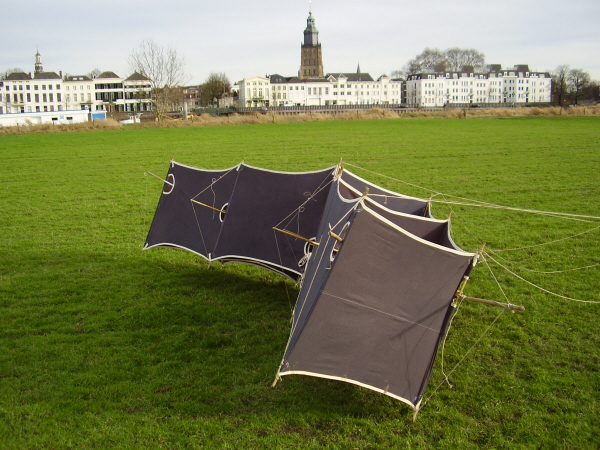
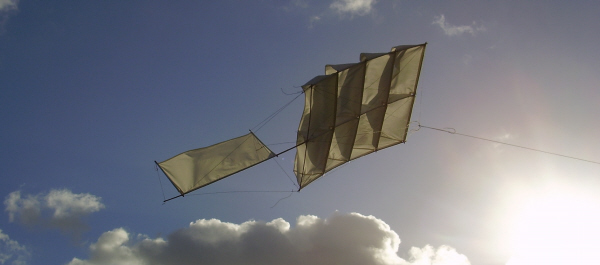
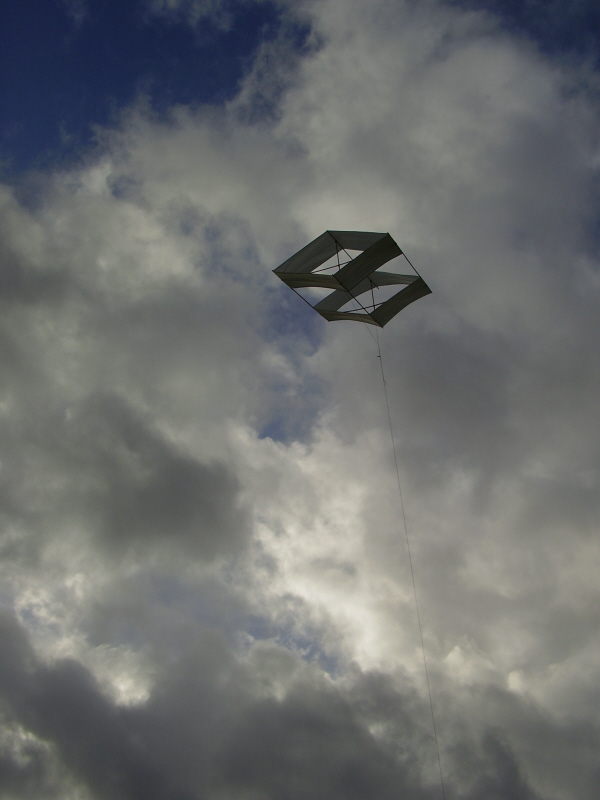
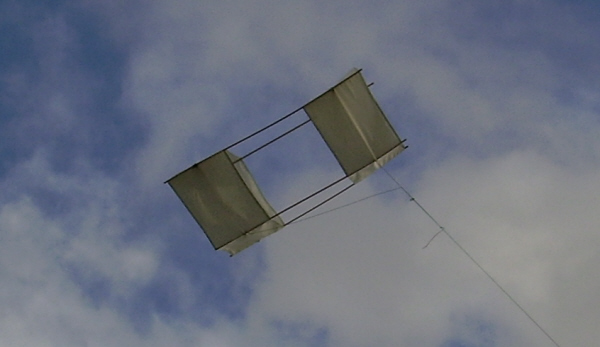
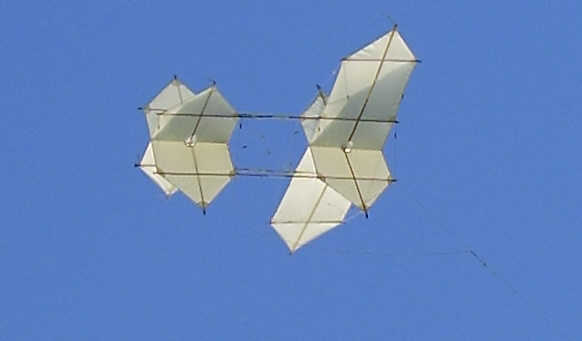
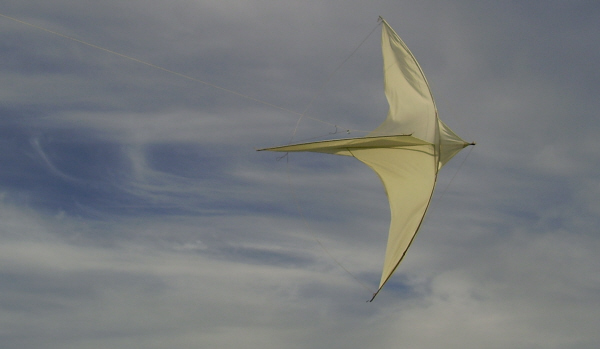
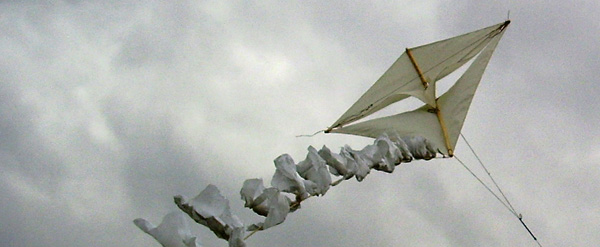
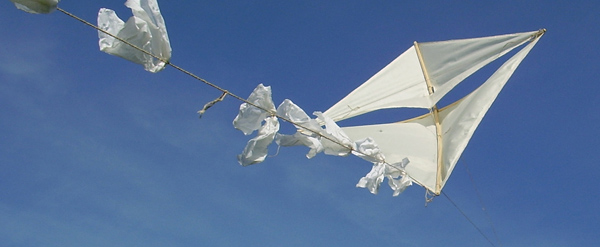
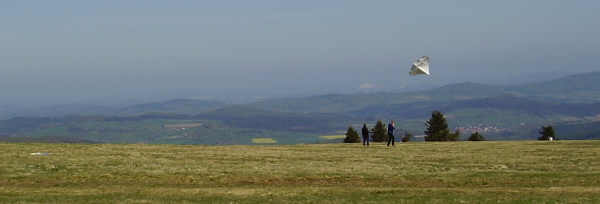
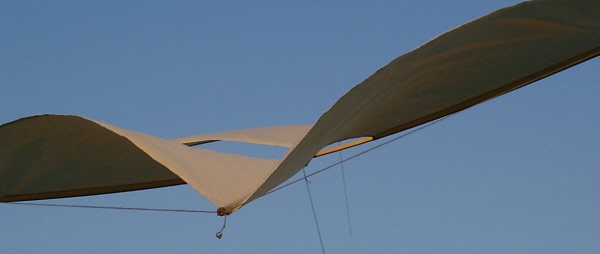
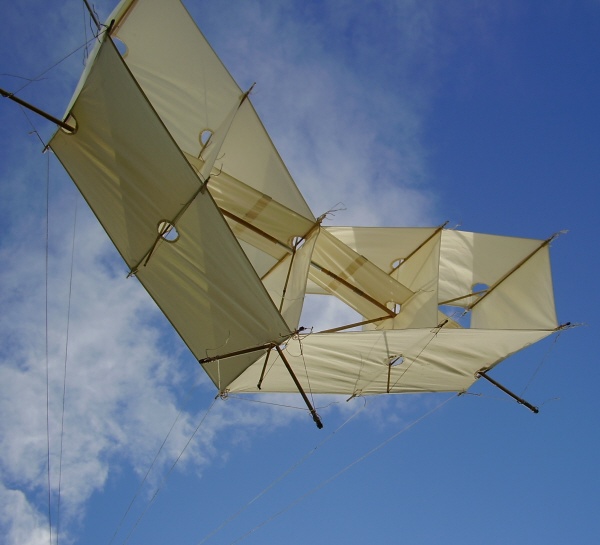
Ok, es kostet schon eine Menge Zeit, aber es ist echt
wahr: die Kusnetsov kann durch spannen der Spanndrähte echt
vollkommen gerade und
flach ausgerichtet werden. Und wenn es dann schließlich gelungen
ist, hat man etwas, worauf man echt stolz sein kann: eine stracke und flache Kusnetsov!
(Fig. 125)
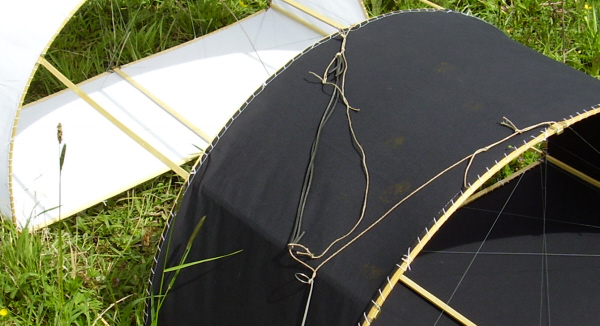
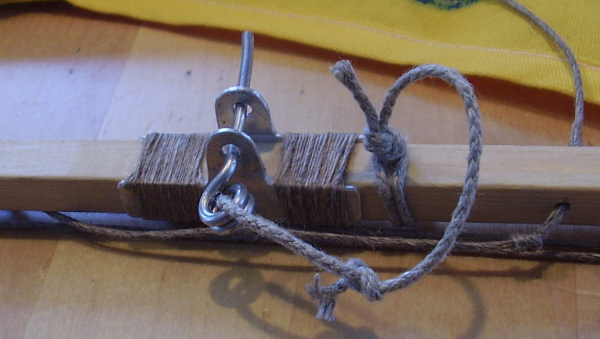
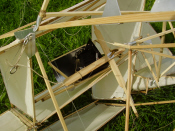
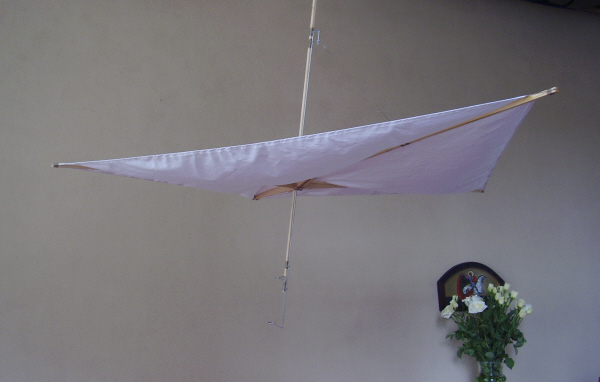
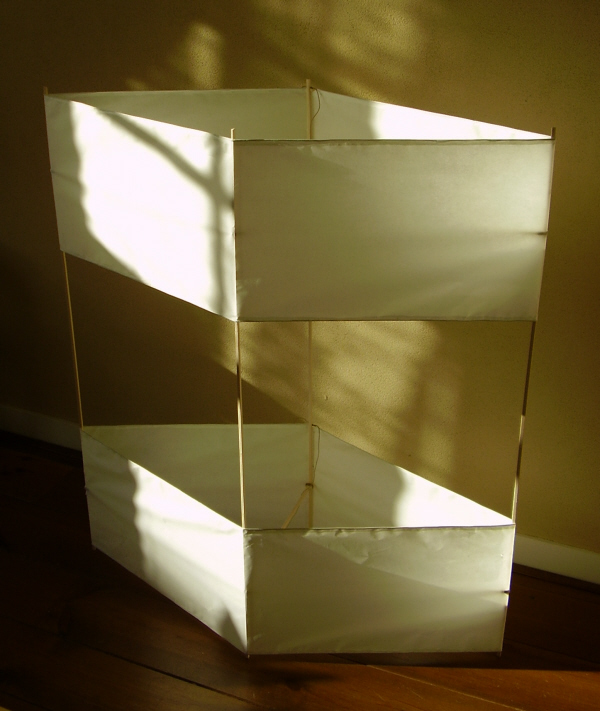
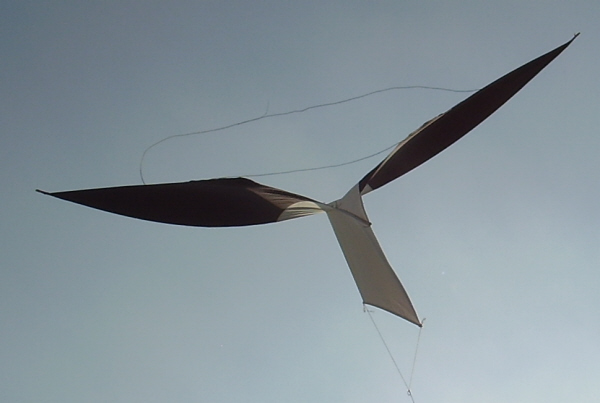
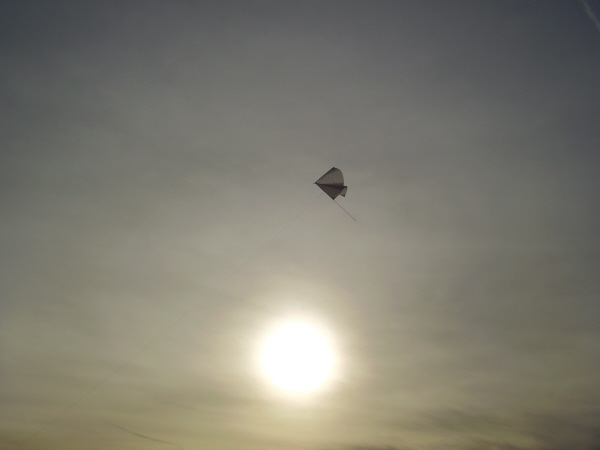
Ein
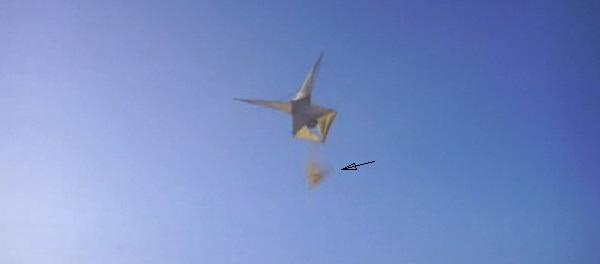
interessantes Detail ist das Gummi in der Waage. Bei einem
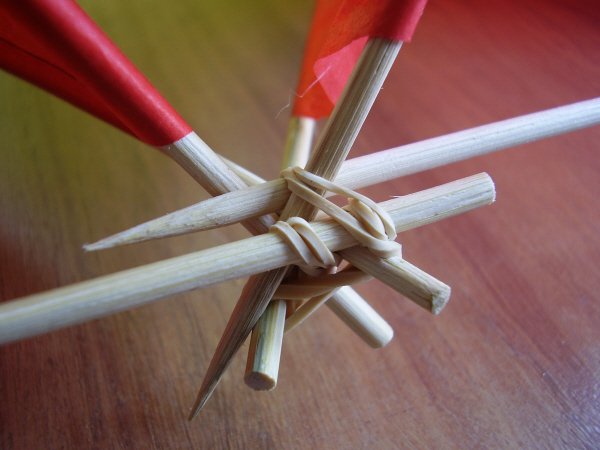
Windstoss dehnt es sich , wodurch der Drachen sich flach legt. Bei einem
etwas ungleichmäßigen Wind kann man an der Drachenleine gut fühlen,
dass das Gummi am arbeiten ist.
(Fig. 124)
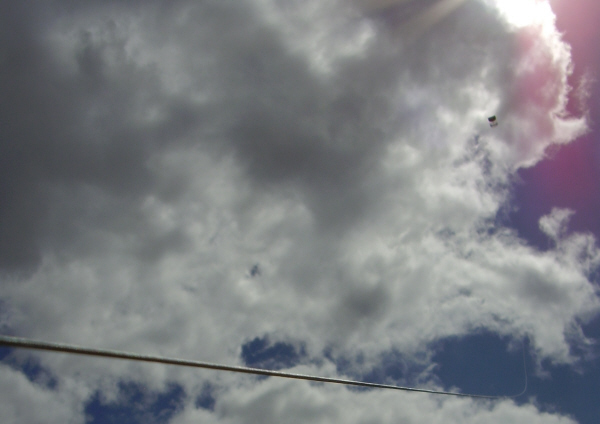
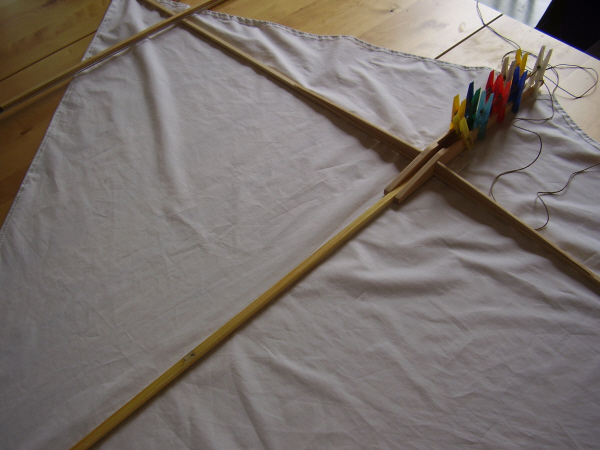
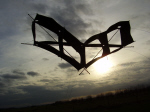
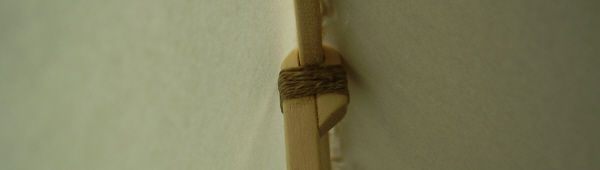
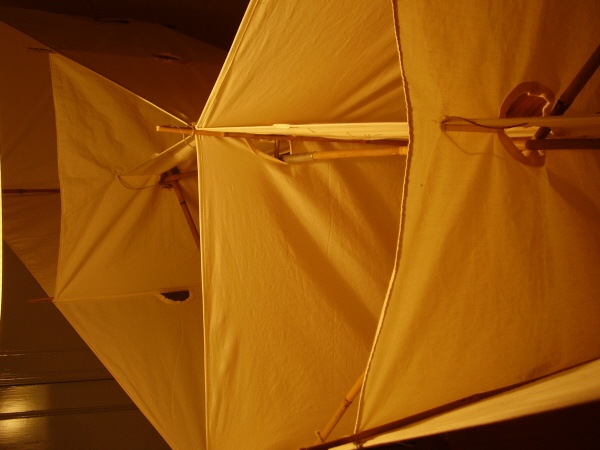
Vielleicht muss ich
die Waage mit dem Gummi noch besser einstellen, denn ab und zu
hat der Drachen die Neigung, zu einem plötzlichen Sturzflug
anzusetzen. Gut , wenn man dann so etwa 260m Leine abgerollt hat, so
dass das ganze die Zeit und
vor allem den Raum hat, um sich wieder zu fangen.
(Fig. 123)
Samstag, den 24. Mai
2010
Gutes Wetter, gute Freunde und super Platz für den 10e Historical
Kite Workshop in Stade in Deutschland. Gute Gespräche und
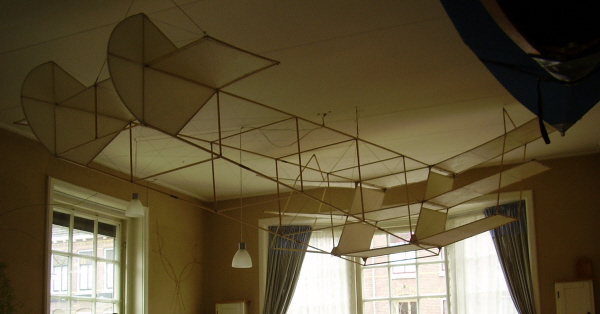
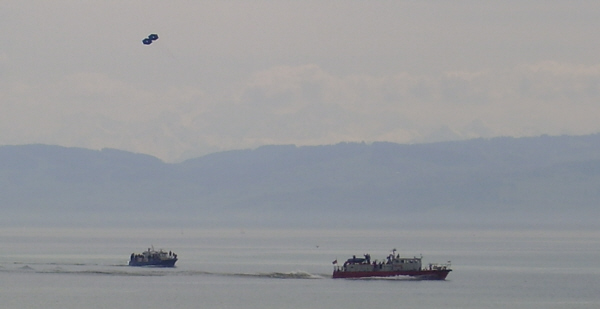
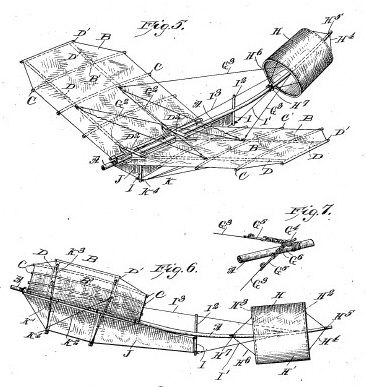
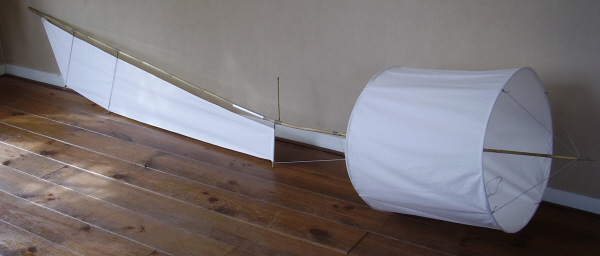
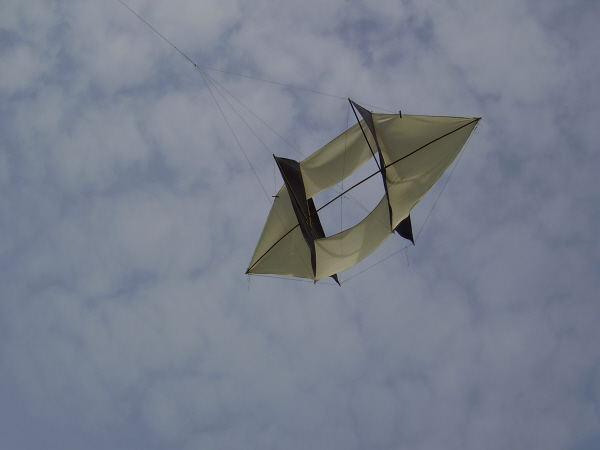
viel zu entdecken, z. B. Radioantenne- Drachen von Wheelwright (US2386762 und CA422725), mitgebracht von Ulli Draheim.
(Fig. 121 und 122)
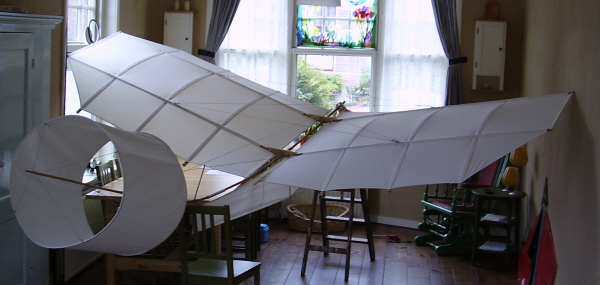
Drachenforschung bis auf die
Knochen. Nie mehr irritiert sein, wenn mein eigenes Werk nicht so
gut geworden ist, wie ich es wollte. Siehe die Arbeit von Profis:
Der Wheelwright Serien-Drachen.
(Fig. 120)
Sonntag, den 25. Mai 2010
Ich durfte sprechen vor dem vollen Saal mit enthusiastischen Teilnehmern des HKWS in Stade. Natürlich habe ich
Barbara Sellers gerade erschienenes Buch gezeigt, voll mit
interessanten Details aus Mathew Sellers technischem Tagebuch. Sehr
lohnenswert! (Zie Bird Kite)
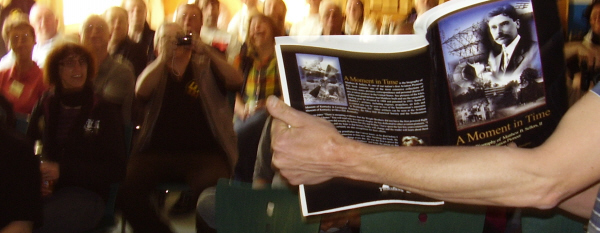
(Fig. 119)
Mittwoch den 14. April
2010
Manchmal ist man jahrelang mit einem Drachen beschäftigt,
ohne jeden Erfolg. Das Papiermodell vom 24. März
2009, inspiriert durch den patentierten Drachen von Holland
aus 1938 ist ein solcher Fall. Die vor Monaten gemachte größere
Version flog nicht einen einzigen Meter! Der Rahmen aus zu dünnen
Stäben verbog sich durch den Wind so sehr, dass sich der ganze
Drachen verformte und nichts mit ihm anzufangen
war.
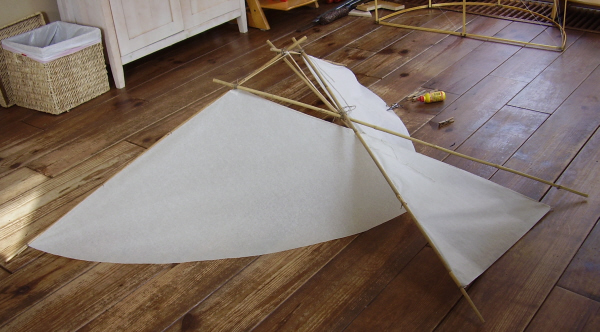
(Fig. 118)
Der Rahmen wurde hiernach verdoppelt mit
dickem Bambus, aber wieder ohne Erfolg! Nun hängt der Drachen zur
Zier an der Decke und dort muss er vorläufig auch mal
bleiben.
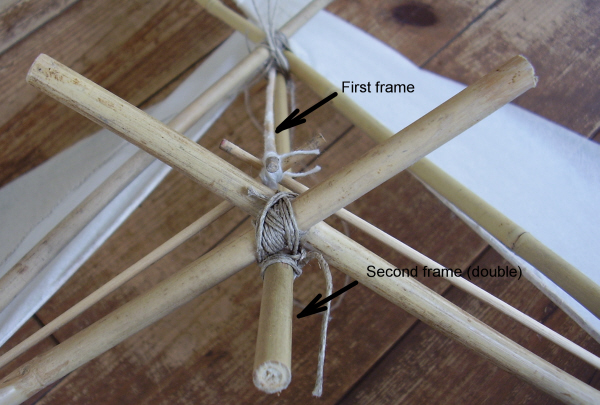
(Fig. 117)
Mittlerweile
war auch noch eine andere Version des Rahmens gemacht und diese lag
irgendwo herum, bis sie von Papier versehen wurde, aber völlig
anders, als es ursprünglich gedacht war. Dieser Drachen gleicht in
keiner Hinsicht mehr der ursprünglichen Idee. Heute nahmen wir ihn
mit zu unserem Drachenstartplatz.
(Fig. 116)
Aber
auch diese Ausführung flog ( vielleicht muss ich sagen:
selbstverständlich) keinen einzigen Meter.
(Fig. 115)
Also
doch mal den Rahmen auf die beabsichtigte und geplante Art und Weise
von Papier versehen und dann noch mal
ausprobieren.
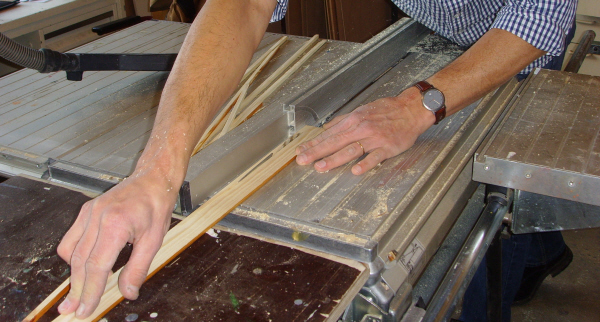
Mittwoch, 3 März
2010
Es ist schon eine ganze Weile her, dass das Ding
fertig wurde, aber jetzt ist es endlich so weit: wir werden es
ausprobieren.
(Fig. 114)
Und
dann geht es auch sofort ausgezeichnet. Vor allem im Vergleich mit dem letzten
Drachenflugtag am 23. September ( ja, das ist schon wieder lange
her…) . Er schießt gleich nach oben und bleibt da auch ohne
Probleme.
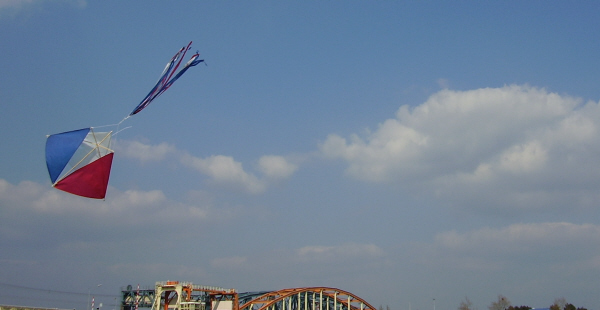
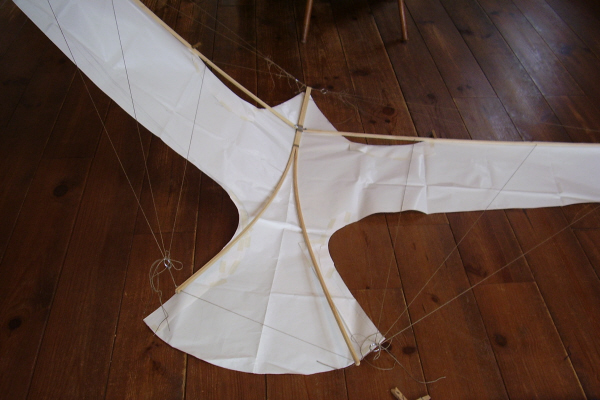
Die Voigtländer ist ein besonderer
Drachen. Obwohl sein Äußeres schlampig ist, fliegt er doch
phantastisch.
(Fig. 113)
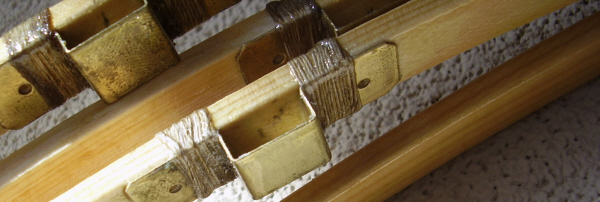
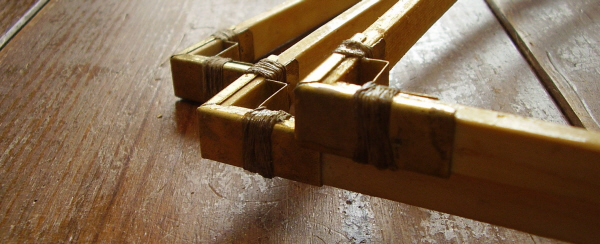
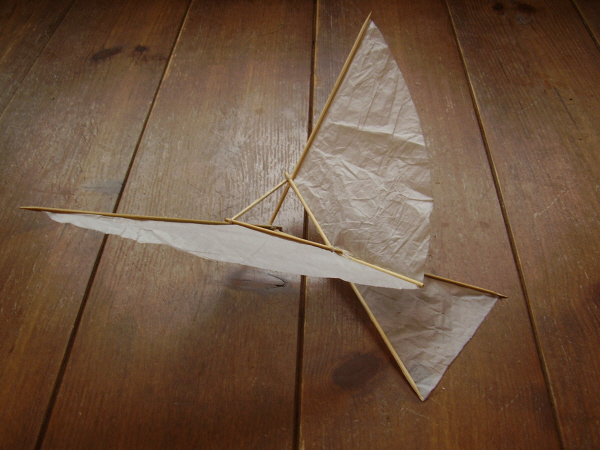
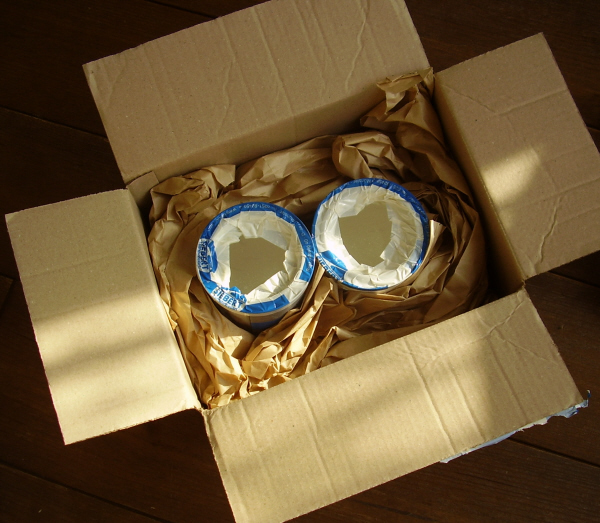
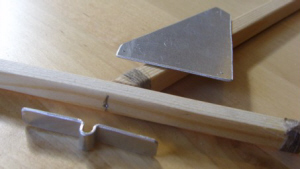
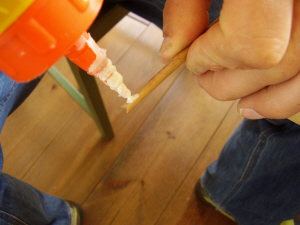
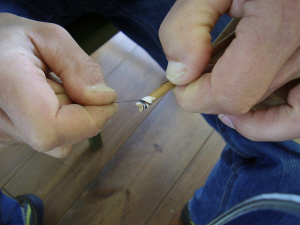
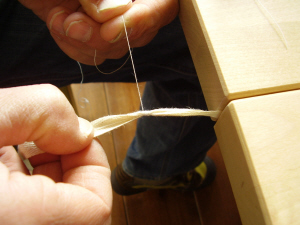
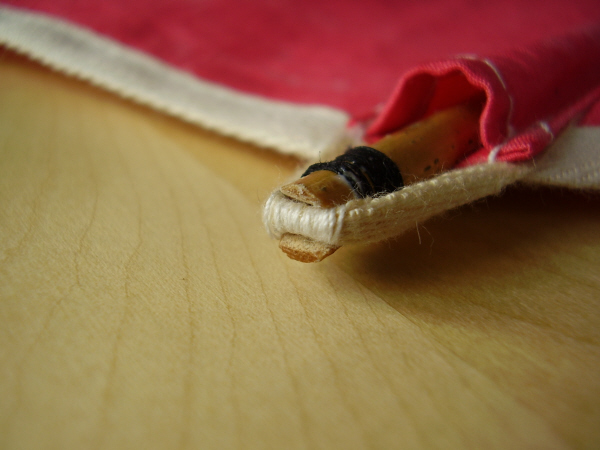
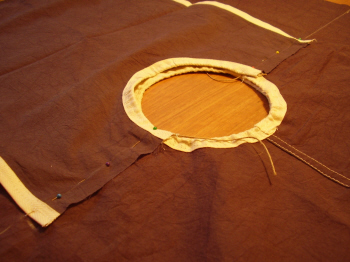
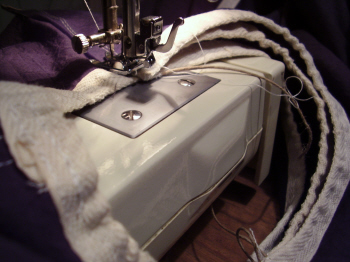
Donnerstag, 4 Februar 2010
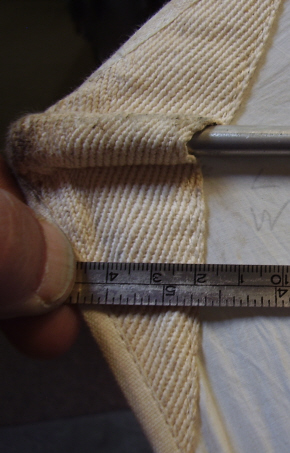
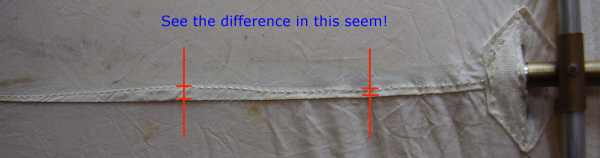
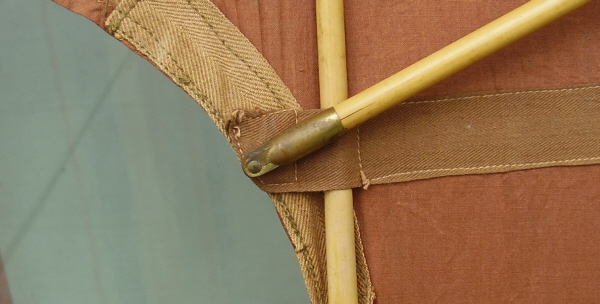
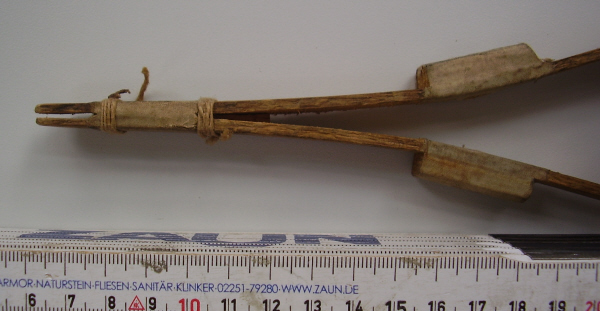
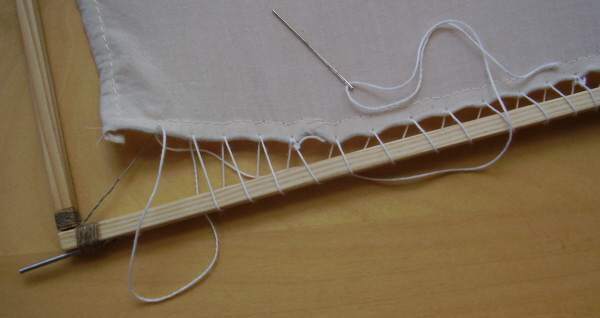
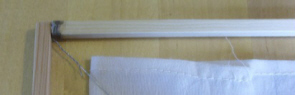
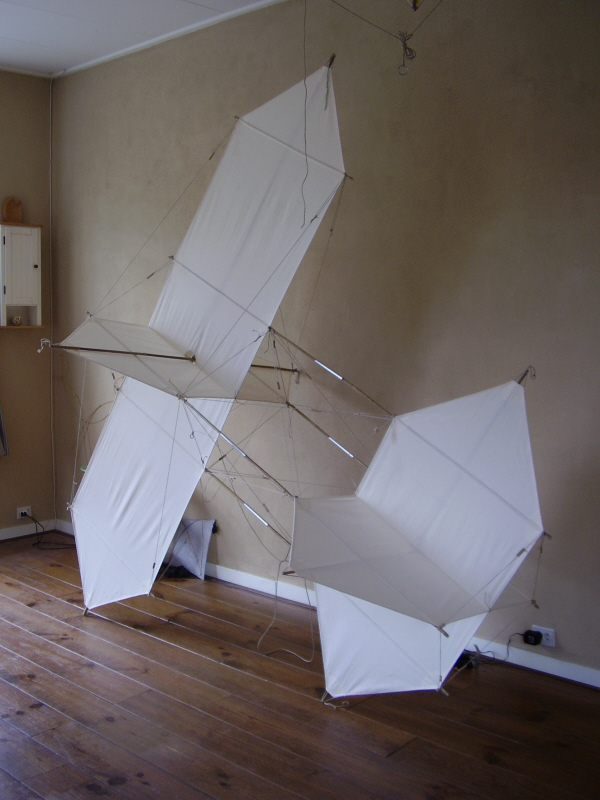
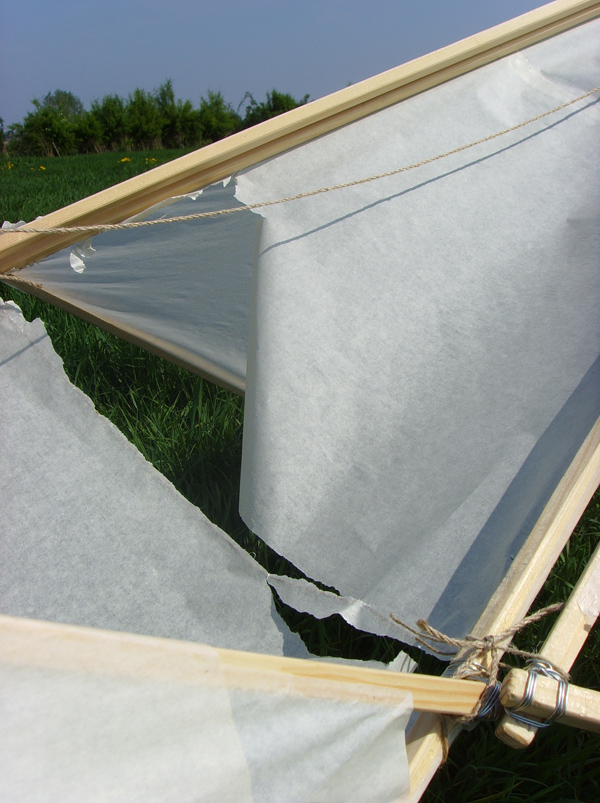
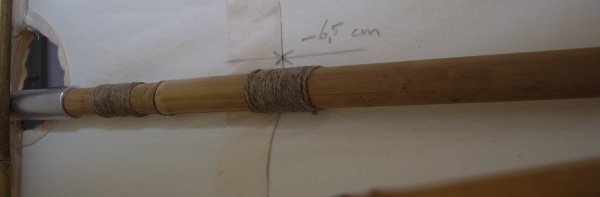
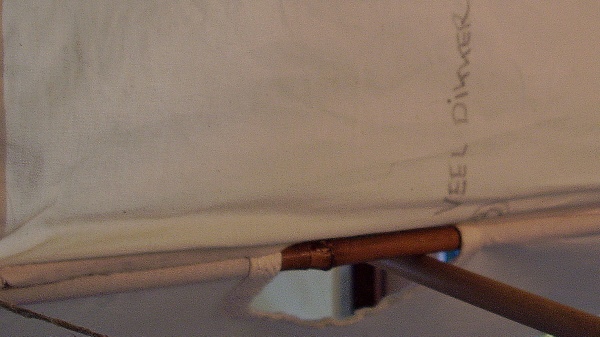
Es ist nicht einfach, um den Stoff am Rahmen der
Kusnetzow zu befestigen. Obwohl der Rahmen mit Eisendraht verspannt
ist, zieht er sich doch ziemlich krumm, als der Stoff am Rahmen
festgenäht wird.
(Fig. 112)
Samstag, 30
Januar 2010
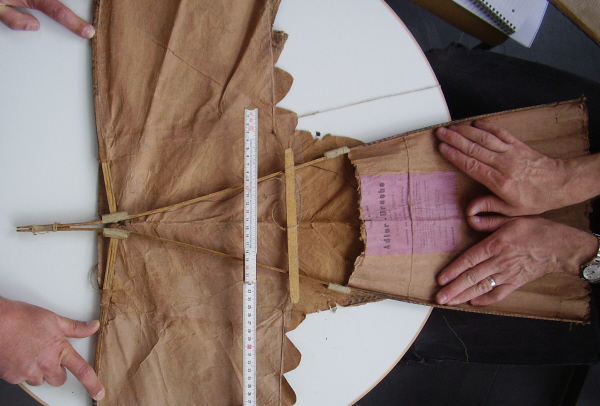
Vor einigen Jahren stoppte ich mit dem Zählen,
nachdem ich meinen hundertsten Drachen gebaut hatte. Ich liebe es,
Drachen steigen zu lassen, aber sie selber zu bauen, macht erst so
richtig Spaß! So kam es, dass ich, noch bevor die Voigländer fertig war,
schon wieder begonnen war mit einem russischen Drachen, der
Kusnetzow. Hierfür gebrauchte ich die sehr gut gemachten Teile aus
dem Baupaket von HKWS 2008 (Historical Kite Workshop) in
Friedrichshaven.
(Fig. 111)
Es läßt sich sehr angenehm arbeiten mit den stets
sorgfältig hergestellten Baupaketen von
HKWS.
(Fig. 110)
Montag, 15 Januar 2010
Und dann ist wieder ein Drachen fertig. Jetzt noch
auf gutes Wetter und Zeit warten für den ersten Probeflug. Einige
Teile sind noch besser ausgefallen, als beim Original. Das war
eigentlich nicht die Absicht…
(Fig. 109)
Samstag, 3. Januar
2010
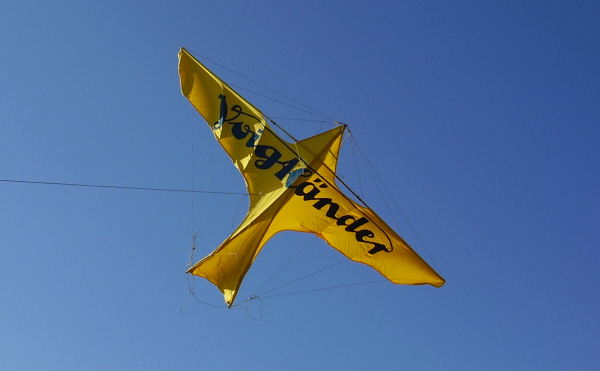
Anhand einer Bauzeichnung aus dem Internet, einigen
Büchern mit Hintergrundinformation und Fotos von Freunden ist es
letzten Monat gelungen, den Voigtländer- Drachen
herzustellen.
(Fig. 108)
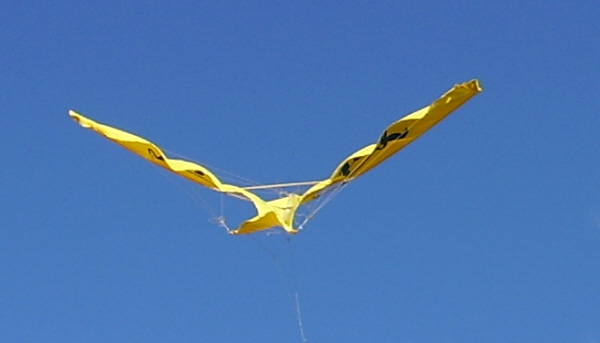
Vor
allem das deutsche
Buch: “Lustige Windvögel” sowie einige Bauzeichnungen von
Horstenke ergeben viele zusätzliche Informationen, die man nicht so
eins-zwei-drei aus den Fotos herausholen kann, wie etwa die Biegung
des doppelten Ständers.
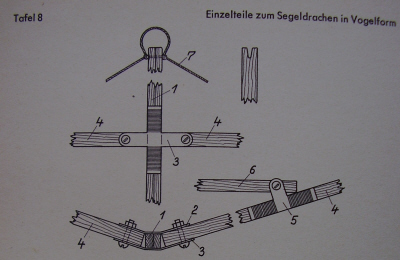 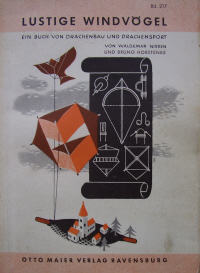
(Fig. 106 und 107)
Zuerst
stellte ich den Rahmen her und dann anhand davon die Form für den
Stoff- natürlich
Baumwolle.
(Fig. 105)
Nachdem
das Tuch fertig war, wurde erst auf Reststücken mit der blauen Farbe
für die Beschriftung experimentiert. Das Beschriften des Drachens,
der gerade fertig ist, ist echt keine entspannende Arbeit: Nichts
darf jetzt schief gehen, kein Fleckchen oder Ausrutscher darf
passieren.
(Fig. 104)
(Fig. 103)
Sonntag, 27. Dezember
2009
Das Katapult (Hochstart Vorrichtung ), entworfen durch
Oesterle für das Abschießen von Segelflugzeugen ist fertig für einen
ersten Test. Jetzt noch ein par Segelflugzeuge bauen, die hinter dem
Horizont verschwinden dürfen. Ich denke übrigens nicht, dass ich
diesen Apparat unter Oesterle's Dreidecker ausprobieren
werde...
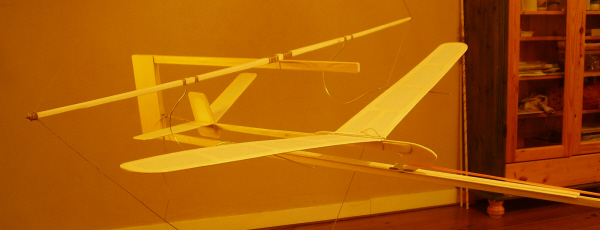
(Fig. 102)
Mittwoch, 23. September
2009
Ein besonderer Moment, der Oesterle Drachen endlich in
der Luft, mit brennender Lunte, bereit um ein Foto mit der alten
Voigtländer aus den dreißiger Jahren zu
machen!
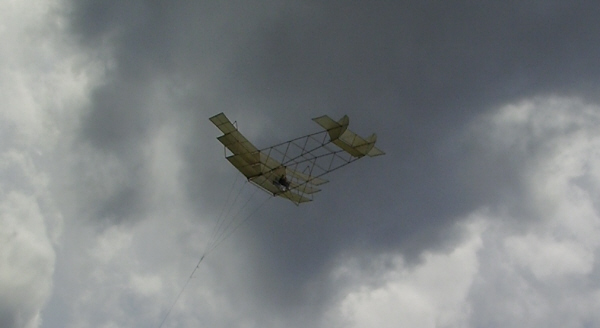
(Fig. 101)
Und
dann passiert es, so kurz nach dem fantastischen Start: der Oesterle
Dreidecker stürzt in einem ekligen Windstoß ab.
(Fig. 99 and 100)
Samstag, 19. September
2009
Der Oesterle (ohne Flügel) oben auf dem Volvo auf dem
Weg zu einem Atelier von Freunden, ganz in der Nähe eines geeigneten
Drachenflugplatzes. Da kann er auf die geeigneten Startbedingungen
für einen ersten Probeflug. Jetzt den Wetterbericht im Auge
behalten! (Fig.
97)
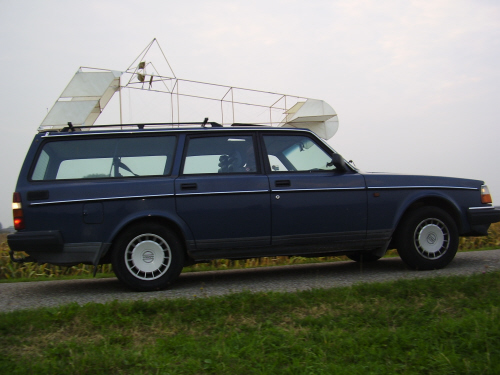
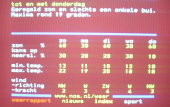
(Fig. 98 and 97)
Sonntag, 6. September
2009
Heute, Sonntag den 6. September, ist es so
weit. Ein besonderer
Moment, nach elf Monaten Arbeit, ist der Dreidecker von Oesterle
fertig.
Was
jetzt... ein kleines Projekt zwischendurch, oder doch wieder etwas
größeres?
(Fig. 96)
Samstag, 29. August
2009
Es
geht vorwärts, das Fesselflugzeug von Oesterle ist jetzt beinahe
fertig. Es ist herrlich, um nach monatelanger Arbeit an anderen
Projekten, diesen Dreidecker wieder zur Hand zu nehmen. The finishing touch, die letzten
Feinheiten. Es ist entspanntes Arbeiten. Etwas, was der erste
Probeflug wohl nicht sein wird, wie ich
fürchte.

(Fig. 95)
Sonntag, 17. August
2009
Auch
der kleinste Nagel ist wichtig, um das Projekt erfolgreich
abzuschließen.
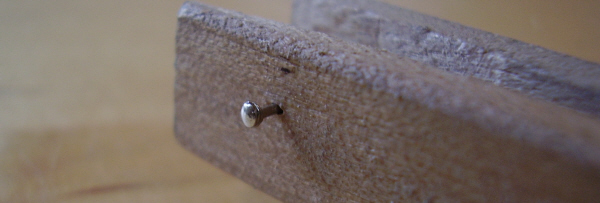
(Fig. 943)
Die
Wäscheklammer, die den Auslöser der Kamera betätigen soll, nachdem
eine Lunte einen Faden durchgebrannt hat (wenn alles gut
geht.)
(Fig. 93)
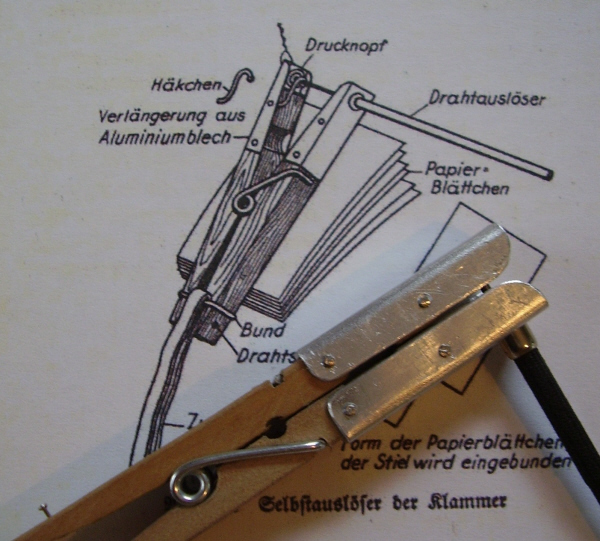
(Fig. 92)
Donnerstag, 9. Julii
2009
Auf dem Filmplatz. Es ist heiß und wir
mússen sehr lange warten. Am Ende geht alles seinen guten Gang und
gelingt, was wir tun wollten!
(Fig. 91)
Mittwoch, 8. Juli
2009
Auf dem Strand bei Ferara in Italien ist es endlich so
weit. Alles
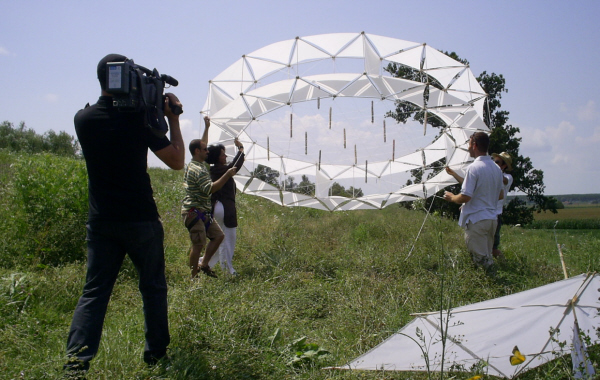
und alle sind beieinander: Der runde Drachen von Alessandro Andreini und
Andrea Casalboni und der Laufkatze, der das Saatgut ausstreuen soll.
Es ist ein spannender Augenblick für alle, vier Architekten und drei
Drachenflieger.
Andreini
und sein fantastischer Drachen mit hölzernem Rahmen, und auch die
Verbindungsstücke zwischen den runden Stangen sind aus Holz. (Fig.
90)
(Fig.
90)

Video vom Test mit dem
Laufkatzen, der Saatgut auf dem Strand von Ferara
verstreut:
Video 12,2 MB Kann
eben etwas dauern, also ...
Oder auf
YouTube

Donnerstag, 14. Mai
2009
Links
und rechts des Pendels zwei Seitenpanele gemacht. Obwohl dies den
Drachen-effekt des Laufkatzen verkleinern soll (fig. 89), denke ich,
dass die Vergrößerung der Oberfläche es einfacher machen wird, eine
größere Menge an Saatgut nach oben zu bringen. Die Seitenpanele sind
demontierbar.
(Fig. 89)
 Der
Laufkatze fertig zum Gebrauch. Ein Sack mit Saatgut als
Gepäck. Der
Laufkatze fertig zum Gebrauch. Ein Sack mit Saatgut als
Gepäck.
(Fig. 88)
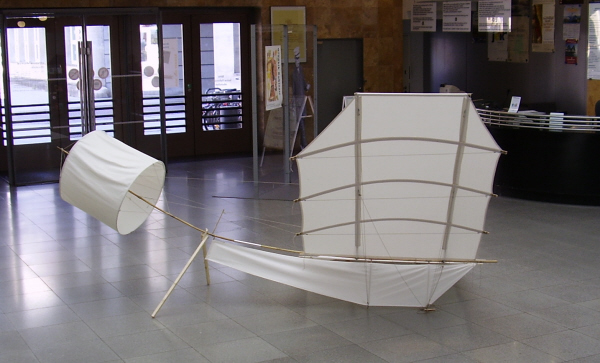
Montag, 25. Mai 2009
Das
Saatgut für den Dokumentarfilm über die Renaturierung der
italienischen Po- Ebene werden durch einen Laufkatzen/Pendel nach
oben gebracht zu einem runden Drachen. Dieser runde Drachen soll
durch die international bekannten italienischen Drachenbauer
Alessandro Andreini und Andrea Casalboni gebaut
werden.
(Fig. 87)
Das
Problem eines Laufkatzen, der entlang der Drachenleine nach oben
geblasen wird, ist, dass er neben seinem Gepäck auch noch sein
eigenes Gewicht nach oben schleppen muß. Hinzu kommt, dass der runde
Cassagne- Drachen nicht der am meisten geeignete Drachen ist, um
eine Fracht in die Luft zu tragen. Es ist darum gut, um einen
Laufkatzen zu wählen, der auch noch Lift- Kapazität hat, wie
ein Eddy oder Woglom
drachenförmiger Laufkatze (Fig. 86). Auf dem Foto eine Flasche
Wasser am Laufkatzen (Fig. 86), um sein Tragevermögen zu testen.
(Fig. 86)
Konstruktion
des Eddy/Woglom-förmigen Laufkatzen.
(Fig. 85)
Video
vom Test mit dem Laufkatzen:
Video 1,93 MB Kann eben etwas dauern, also
...
Oder auf YouTube
Ende
Deutsche
Übersetzung. Deutsch-Übersetzung
von F. Tuczek
More in English...
Saturday, 28 March
2009
The full scale one didn't fly, because of the weakness of
the very thin frame. I tried to make a very light kite, but evething
turned out to light and fragile. But the little model was
beatifull.
(Fig. 84)
Tuesday, 24 March
2009
Made a model of a new paper kite inspired on the Holland
1938 kite.
(Fig. 83)
Sunday, 22 March
2009
Some months ago a mail from Venice - Italy
arrived:
"We are thinking about a no profit Po
river re-naturalization project and we have to prepare a
little movie to express the suggestion of the idea.
We would like to use a big kite to spread some endangered
species seeds on the territory; a boat along the river should carry
the kite.
Would you be interested in helping us to realize this
artistic action and to solve the technical problems of the
project?
Giulia and
Chiara"
It was the beginning of a new friendship with four
architects from Italy, Barcelona and Servia! I can look back to many
exiting adventures with this little group. Thank you, Giulia,
Chiara, Masa and Vuk.
Today we started with the first tests of spreading seeds
by a kite. We used the Holland 1938 kite (Fig. 82) for the first
attempts and tried several spreading bags and release systems under
the kite.
(Fig. 82)

We made also some video's to show the
results spreading seeds by a kite, one of them:
Video 3,91 MB Take your time to
download...
Or on YouTube
(In the very beginning of this video you can see the
particular effect of the patented Holland kite steering mechanism!)
We used sawdust (Fig. 81) for experimenting in
because of the low costs and it was harmless for the nature at the
flying field.
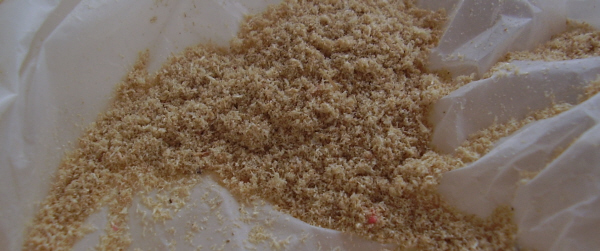
(Fig. 81)
Saturday 18, April
2009
More beautiful historical kite details appeared in
Bad Hersfeld during the International Historical Kite Workshop (Fig.
97 and 80): the
cerf-volant Oiseau owned and kindly made available for documentation by Axel
Goldbach.

(Fig. 80)
The French kite builders did there
job very well on this patented kite!
(Fig. 79)
Friday 17, April 2009
In Bad Hersfeld during the International Historical Kite
Workshop Frits Sauvé and I were in the occasion to examine a very
old and patented German kite (Fig. 78). Owned and kindly made
available for documentation by Uli Draheim.
(Fig. 78)
Lovely 100 year old kite making details (Fig. 77), made
by professional German kite makers. This is the kite research I like
the most!
(Fig. 77)
Monday 23, February
2009
Oestele's Dreidekker is almost ready. Just
hanging at the ceiling waiting for the finishing touch and his first
test flight. But it has to wait, some other projects have to be
finished first.
(Fig.
76)
Saturday 17, January 2009
With some good advise from some good friends, today the
solution for all my problems (as it seems to be already) arrived by
mail.
(Fig. 75)
The only trouble now is to find some time to open the
cans and give it a try. In the meanwhile Oesterle's body-frame takes
a lot of room.
(Fig. 74)
Wednesday 31, December 2008
The last day of the year and I am sure: the real old
fashioned shellac is not the real thing. The fabric of the
little wing, below on Figure 73 has been detached and tied again and
is very tight again. The others should have to be done also. But
there is no more room to stretch the fabric in the frame (See as
reverence Figure 70.) So I have to look for a better solution then
shellac.
(Fig. 73)
Friday 26, December 2008
Finishing the cloth with real old fashioned shellac (Fig.
71) seams to be more and more going the wrong way! Although having
fun doing it, because it feels like real craftsman work (Fig. 72),
it slowly occurs to me that it is not working. Instead of getting
very tight cloth on the wings, it is getting very
slack.
(Fig. 71) (Fig. 72)
Monday, 22 December
2008
Still going on fastening fabric. This time to the frame
parts. Although everything is written down in the manual: Wie
baue ich mir selbst? Fesselflugzeug ~ Dreidecker from Valentin
Oesterle, sometimes surprises occur. In contrast with the genius
frame construction, fastening the fabric through the papered frame
parts seems a bit amateurish. See Figure
70.

(Fig. 70)
Sunday, 7 December
2008
Finished tying the fabric in the last Oesterle Dreidecker
wing. Short lengths of thread have to be used
(Figure 69), as the manual said. So that in case of breaking one
piece thread during flight the fabric will stay in place and not
will be blown away.
(Fig. 69)
Sunday, 30 November 2008
Last 8 months, hours and hours have been spend on
research, collecting and photographing patented and commercially
manufactured kites. All about getting a unique list of kites on the
web with well- or less known kites over the years. Kites which have
been patented, manufactured in huge amounts and sold to customers.
Who loved them or hated them for their flight qualities. Maybe you
might recognize one off your first kites.
The first part of the project is almost finished, please
take a look at the concept version of www.firstkites.nl/patentedkites.html, and check how
the new web page will be.
The second part comparing the kites with their patents.
And checking their flight qualities is in full swing. I hope to be
able to show the results within some
months.
(Fig. 68)
Wednesday, 26 November 2008
Cutting the sails for the wings and sewing the seems for
Oesterle's Dreidecker is not difficult. Sewing two sides of the
wings and then just trying and stretching the fabric until the right
measurement is found.
(Fig. 67 and 68)
Saturday, 22 November
2008
From all the vertical parts which has to be covered, both
sides are covered with paper as described in the building manual. A
picture of the back part (Leitwerk in German)
of the body. (Figure 66)
(Fig. 66)
Saturday, 15 November
2008
The triplane body, Oesterle's Dreidecker, is ready. The
question yet is which kind of covering I have to choose, fabric or
paper. Both kind of materials are described in the manual and have
there own benefits and disadvantages. Paper is lighter than fabric,
but it is weaker. It is shrinking when getting very dry. On a hot
sunny day in summer it might tear by this. It is also cheaper than
fabric. All this is also mentioned in the old building manual. Not
mentioned, but really true is that paper is easier to apply to the
wings. The horizontal parts which has to be covered are covered with
paper.
|
(Fig. 65)
|
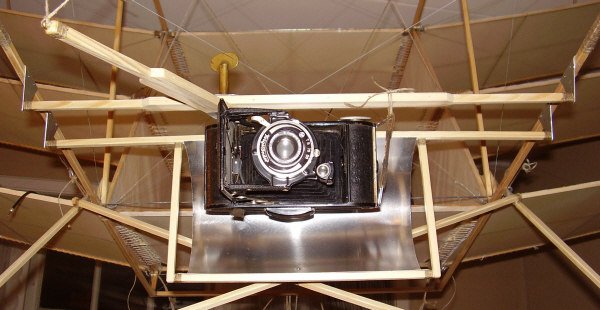
The lightness is very important in this project
while I intent to raise an old 1936 camera with the kite to
take 'as it was done' black and white pictures in the
historical way.
And while doing this I like to video the whole
process in a modern digital way on the same kite.
(I hope everything will work out!) |
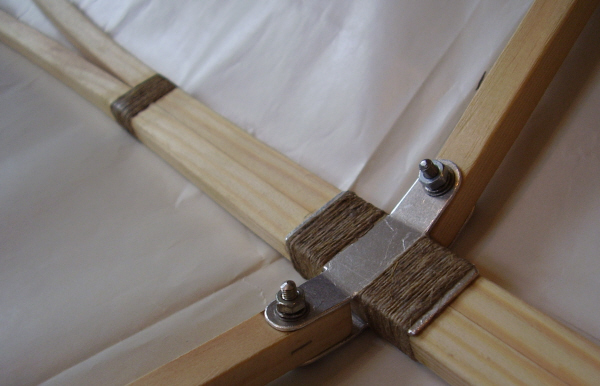
Oesterle made a very simple but ingenious construction.
Al the wooden parts are nailed(!) together. And it works out when
nailed and bored with care even the square 6x6 mm sticks. The ends
of the sticks are bound with yarn to protect against splitting.
See
figure 64 with one of the wing connections from
aluminium.
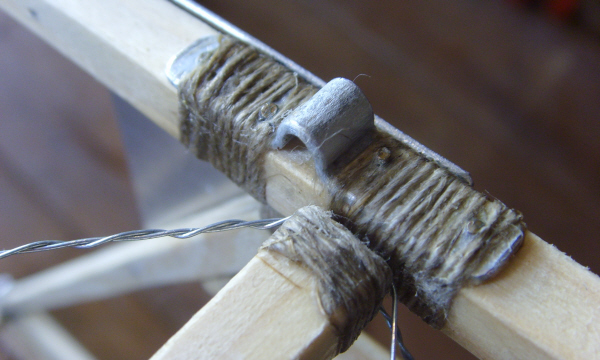
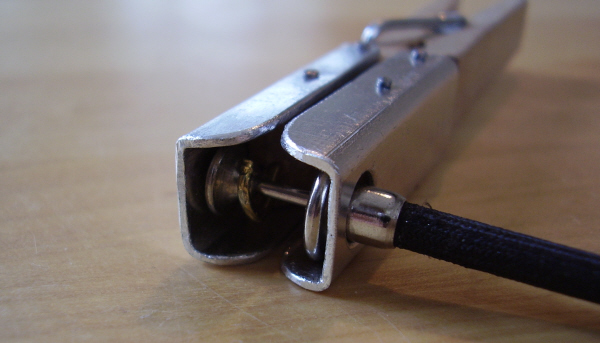
(Fig. 64)
(Fig. 62 and 63)
October 2008
The work on the 'as original as possible' Oesterle
Dreidecker project started with sawing the ribs and other parts of
frame and wings. There are three sizes of sticks described in the
German building manual from 1936: "Wir baue ich mir selbst ein
Fesselflugzeug - Dreidecker" from Valentin Oesterle. (How to
build my own triplane kite):
8 mm for the longerons in the body
7 mm for wings and ribs in the front of the
body
6 mm ribs in the end of the body
Very many meters had to be sawn, luckily my father gave
some help. But still there was a lot of work to do, before the
building could be started.
(Fig. 61)
Saturday and Sunday, 26 and 27 April
2008
Two beautiful days at the Zeppelin Museum with a lot of kite friends
at the Historical Kite Workshop in Friedrichshafen at the Bodensee
in Germany. A lot of great kites were exposed in the front of the
museum. The Sellers kite was finished just in time and photographed
in the museum, see picture 60.
(Fig. 60)
A beautiful shot (fig. 59) from the balcony at the
Zeppelin Museum of the launch of a replica of a N-Drachen as used a
100 years before by the daily kite launches at the Bodensee to do
the meteorological
observations. The replica is build by Charles Tacheron and is more than two meters
high.
(Fig. 59)
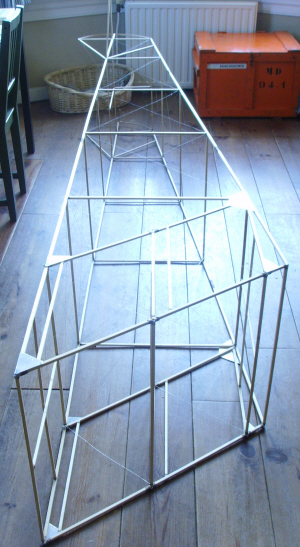
Thursday, 10 April 2008
The kites doesn't fit anymore in the room. This is not so
pretty because all the parts are ready and the adjusting of all the
parts together has to be done now.
(Fig. 58)
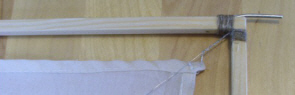
Sellers in his Patent description about the coupling rods
on which he seems to be particular proud of:
"In this construction the coupling bar 2 is bent between
its ends to form an eye 3 and line wire 1 passes along the shank 4,
through the eye 3 and is given one or more turns about the eye and
then several turns around the shank, then one or more turns at 5
around the line wire, then several turns around the shank back to
the eye, then one or more turns at 6 in the eye." See figures 56 and
57.
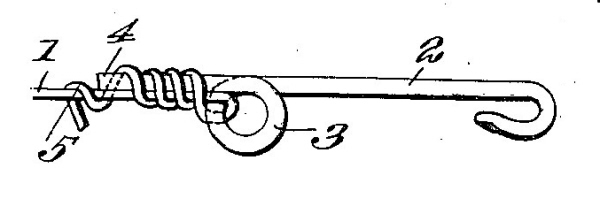
(Fig. 57)
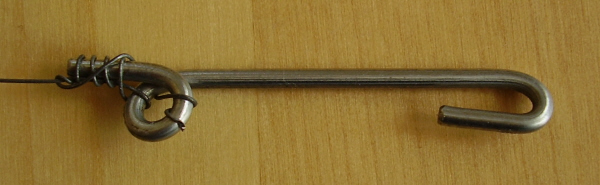
(Fig. 56)
Wednesday, 2 April 2008
UPS-World Wide brought me yesterday the patented Fire Bird kite.
The kite was still in his original box and must be 40 to 50 years
old yet. I could not help it, I had to try this kite in spite of his
remarkable age (fig.
55).
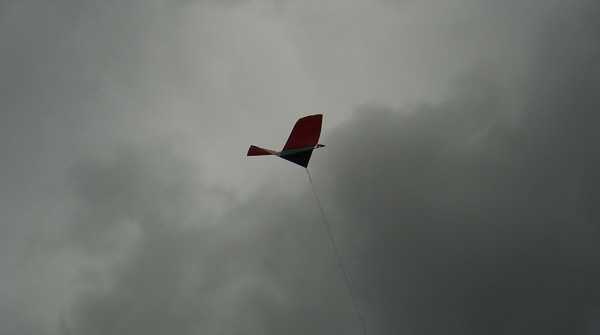
(Fig. 55)
Flying this kite I had the same experience as with some
of the patented kites I build myself. It flew, but not perfect!
Maybe the wind was to turbulent this day. The kite flew almost like
a fighter kite as be said on the kite box.
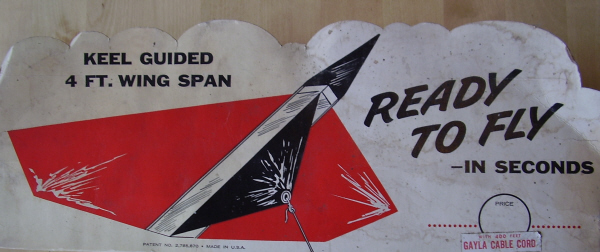
(Fig. 54)
There is a difference between the patent drawings and the
kite Gayla Manufactured. See the patent drawings below. This proves
that it is not always necessary to follow the patent drawings
(fig. 53) as exact as
possible by building patented kites. (How much proof do you need to
do something......) Check figure 8 on the patent drawing and the
photo of this part of the kite below.
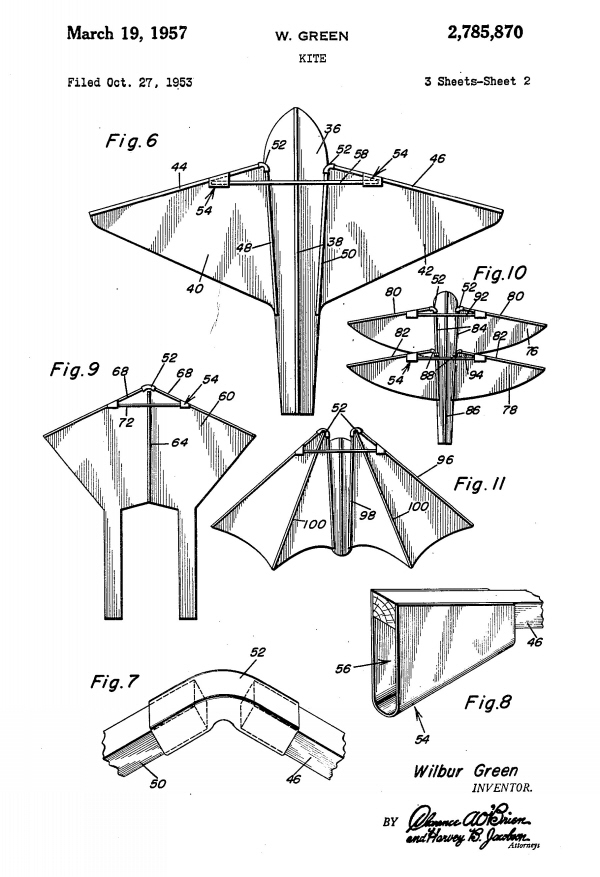
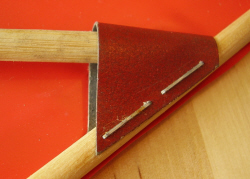
(Fig. 53)
(Fig.
52)
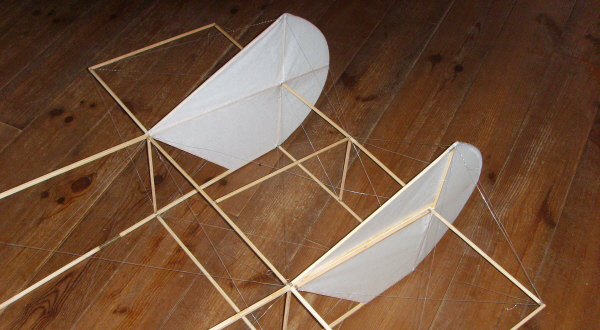
Monday, 24 March 2008
Several weeks ago I started the building of the US
Patent: US 886159, patented April 28, 1908. It is a kite from Mr.
Matthew B. Sellers see figure 51. As usual there were no
measurements in the patent so measurements have been chosen by
careful looking at the drawings in the patent. And by trying to get
some good conclusions about the kite measurement by comparing the
constructions details by each other.
But you can imagine how lucky I got when I came in
contact with the Aviation Museum of Kentucky, USA which made
photographs of a replica of Sellers' plane available and also his
personal notes from 1904 with drawings of the construction details
and even a photograph of the first made kite of this type. Special
thanks in this to Mr. Philip Baugh and Mr. Dennis Sparks.
Now I am trying to finish the building of this kite
before April the 28th this year 2008. Because on that
date it will be 100 years ago that this kite, called by Sellers Bird
Kite model No. 2, was patented.
(Fig. 51)
(Fig.
50)
On
figure 50 you can see the wing adjustment hook as drawn at
figure 7 on the patent. This hook is placed in the cylindrical tail.
Today I finished the fuselage of the kite. The cotton covering of
the wings is ready and also the cylindrical tail (fig.
49).
(Fig. 49)
Thursday, 26 February 2008
(Pic. 48)
Before I started the building of the Perrin kite from
1912, I had some thoughts to chance the model in a better shape. See
picture 2. But now when I finished the test flights, I am glad I
didn't! Only the use of two clothes pegs was enough to get this kite
in the air and let it stay there as long as I desired. In his
original, beautiful, historical shape. (Pic. 48 and Pic. 46).
See the leading edges of the triangle wings for the clothes
pegs.
(Pic. 47) (Pic. 46
From La Revue du Cerf-Volant, December 1912, P.
276)
Monday, 25 February
We tested the by Jan Kits improved version of the SOS
Brookite, and it indeed flew like a Jan Kits kite. Check the plan on
the SOS Kite page. (Not ready yet!)
(Pic. 45)
Only the red and yellow parts are 'original' at picture
45 but the important improvements are almost invisible.
Monday, 4 February 2008
The Dunne kite of Frantzen is ready, most of the bamboo
is changed for stiffer ones and now at the third trial it flies very
well. (Pic. 44)
(Pic. 44)
The Big One, started building somewhere in 2007,
weights almost 5 kilo's and has a span of 4,5 meter!
(Pic. 43)
A little dramatically video of the first test flight. I
was alone, so I couldn't do everything that had to be done. I even
could not get the outer two bridles. So the kite was flying with
only one third of the bridle pinned to the ground. Which proofs how
remarkable this kite is. It can fly a bit with almost no bridle and
with very weak and to thin bamboo sticks. These sticks were replaced
later.
Video 7,37 MB Take your time to
download..
Sunday, 12 January 2008
Racke (Around 1900) is still waiting for a nice sunshiny
day. In the last months the whole bamboo frame is split into half to
get the frame as light as described in the old books where this kite
from Belgium is mentioned. (Pic. 42)
(Pic. 42)
Picture 41 is taken at a test flight some months
ago.
(Pic. 41)
Sunday
09-12-2007
Not the most beautiful
kite, but designed as it is as a good flyer, just fun to fly: The
Potter Diamond Kite. Almost build as described in the Monthly
Weather Review. But this time build as a light wind kite with a
paper covering on light poplar wood. (Pic. 39 &
40)
(Pic.
40)
(Pic.
39)
Detail of the notched
strut (Pic. 40)
(Pic.
40)
Guests from 30 km/h - 18 mph are to much for the
poplar light wind frame. See the deformation of the frame at picture
39.
(Pic.
39)
Sunday
25-11-2007
First test flight of the
whole size Ickx kite ended in barbed wire. But the second and others
were a great success. Only some adjustments to the bridle have to be
done yet. (Pic. 38)
(Pic.
38)
(Pic.
37)
Big kites belong in the
air, but the problem is, you have to build them at home. (Pic.
37)
Tuesday
23-10-2007
Today I broke my
personal altitude record with a simple somewhat heavy winged
triangular box kite (Pic. 36) constructed as if it was a toy kite.
Dimensions: 160 cm. wide, 117 cm. high, 390 g.
weight.
We had a 4 Bft. today
and it was big fun with simple kites. I think there are two kinds of
kites: Kites you like to make, test and experiment with and another
kind of kites for flying them with great fun and no
problems!
(Pic.
36)
Sunday
23-09-2007
The Hirondelle doesn't
still fly very well. Every adjustment has been tried out, also a
second Hirondelle has been made (Pic. 33), with the same results.
The latest idea now is a modification of the frame, see pictures 34
(before modification) and 35 (after modification). With this
modification the kite gets his wings somewhat higher and in a better
shape. It also looks more like the picture shown in the article in
Le Revue du Cerf-Volant, July 1912 by V. Aston, where this kite
comes from.
(Pic. 34
and 35)
The white swallow kite
(Pic. 33) has his wings and major part of the body cut out of one
piece of cloth, as described in the article from 1912. A more open
cloth has been used to give the kite more stability, but it wasn't
enough as you can see at picture 33.
(Pic.
33)
Saturday
25-08-2007
Its a good thing: taking
as much pictures as you can during test flying. Afterwards at home
you see things you didn't see at your flying
field...
Maiden test flight of
the Hirondelle, 1912. A bird kite (swallow) which has been flown
2000 m. high once. Our record this particular day: almost 20
meters!
(Pic.
32)
The Hirondelle with al
the adjustment lines untied (Pic. 32) has nice shaped wings, but
doesn't fly very well...
Saturday
21-07-2007
Third test flight of the
kite of the Ickx brothers. Not enough wind... no real
flight.
(Pic.
31)
The only picture taken
some seconds before the front wing stick broke. (A little sharpened
picture 31.)
First thoughts on the
test results:
-
Quick raiser (We pulled the line by running as an
authentic kite flying child!)
-
Stable kite
-
Small wind range
-
But
strong puller, when the kites catches some wind (As described by the
Ickx brothers.)
-
This
heavy half size model needs almost 5 Beaufort (Densité of this kite:
a little more then 0,6)
-
The
whole size one, which is under construction, must be able to have a
better practice.
-
This
kite has absolutely no aero dynamical wings, the wings are as flat
as possible.
Construction detail from
one of the small wing spreader sticks. (Pic. 27 - 30) The stick on
his place at picture 26.
(Pic. 27
- 30)
(Pic.
26)
Thursday
12-07-2007
What more do you
need...?
(Pic.
25)
20 Minutes work and
there it is: a real Bell tetrahedral kite, made of barbeque pins
(bamboo), rubber bands and some pieces of rice
paper.

(Pic.
24)
But there seems to be
some relation between time spent building your kite and stability in
the end...
Sunday
29-04-2007
The improved Irvin kite
has been tested and the results are very good! It can even fly
(better!) without a tail. The improved shape of the front sail of
the kite, has more
similarity to the drawings in the patent.
Irvin before
modification:
(Pic.
22)
Irvin after
modification:
(Pic.
21)
Friday
27-04-2007
Although we had to coop
with the usual problems (Pic. 18) when flying experimental paper
kites, in the end we succeeded to take good pictures of the paper
version of the patented kite from Mr. Holland. (Pic. 20) See how the
principals of this kites works: http://www.firstkites.nl/m7.html

(Pic.
20)
The usual problems with
experimental paper kites. (Pic. 18) A difficult moment: the
principle of the patent doesn't work for some seconds. (Pic.
20)
(Pic. 18
& 19)
Sunday
22-04-2007
Kite flying on top of
Germany. (Pic. 17)
Very rarely: Kite flying
on the glider airfield 'Wasserkuppe' during the International
Historical Kite Workshop 2007. Three new built historical kites,
from left to the right: Roloplan, Dahl and a Pearson
Roller.
(Pic.
17)
Some children with basic
kite flying between all the historical kites, the real thing...
(Pic. 13 - 16)
(Pic. 13
- 16)
The workshop kite from
Gotlob Espenlaub in its origin environment. (Pic.
12)
(Pic.
12)
March -
April 2007
Nothing special, still
working on a bigger Frantzen (See Saturday 24-02-2007). This one
will be in black cotton. Nothing special, only bigger kites need
more ours sewing...
(Pic.
10)
(Pic. 11)
In the meanwhile on
sunny Saturdays, some test flying and adjusting on other kites is be
done. For instance to decrease the flapping effect of the sail of
the Dahl kite (pic. 9) with keeping the principle working of the
kite in mind...
(Pic.
9)
Saturday
24-02-2007
"Etude pour une
cerf-volant", wrote Lucien Pierre Frantzen above his sketches in 1914. Today
I had a perfect second series of test flights and it felt like a
symphony! Everything was perfect, the weather, the wind and most of
all the kite: half size model #76, span: 230 cm. (Pic.
8)
(Pic.
8)
Saturday
17-02-2007
First flight of Génesis.
(Pic. 7) Four pieces straw, an orange wrapping paper and very little
glue, that was all. Lounged from a playing field between houses one
stick broke when it got to high and caught the 'full' 2 Beaufort.
But it still was capable of flying!
Surface: 0,0925 cm˛,
span: 37 cm, length: 115 cm, weight: 4 g.
('Génesis' is the brand
of the oranges which were covered with the
paper.)
 
(Pic.
6)
(Pic. 7)
Friday
6-02-2007
Third test flight of the
Kurkjian. Everything is working! (Pic. 5)
(Pic.
5)
Sunday
21-01-2006
Starting again (after
the first test flight at 01-10-2006) with the Frantzen/Dunne
project: Adjusting the half size model #76. (Pic.
2-4)
(Pic.
4)
(Pic.
3)
(Pic.
2)
Saturday
20-01-2007
Second test flight of
the Kurkjian. Some problems with the bridle point. (Pic.
1)

(Pic.
1)
previous
page /  |